Script Editor
Marker
Basic operation
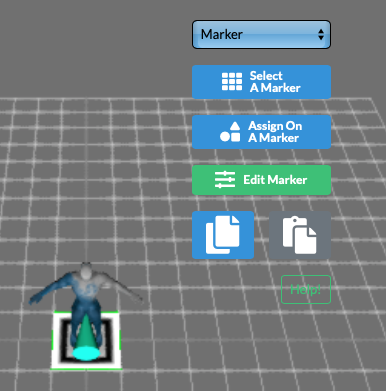
①
②
③
④
⑤
- Marker selection
One pseudo marker for markerless and 6 markers prepared by XR Studio are listed in the select box.
When selected, it will be displayed in the center of the scene coordinates. - The marker image selection window opens.
To add an original marker, use Marker Generator. - Open the Marker Assign window for selecting the object model/collision/audio/video data to be assigned to the selected marker.
- Edit scale of selected marker
- The selected marker is displayed.
AR marker design
AR marker recognition technology is not very flexible.
In the case of a marker printed on glossy paper or the like, the image is judged to be different only because there is a part that reflects light, and it is excluded.
In other words, too elaborate designs are problematic in terms of reliability when used as markers.
Markerless AR is very flexible
Markerless AR without markers is very flexible.
The markers are completely irrelevant and will index any floor surface.
AR marker assignment window

①
②
③
- The name of the selected marker is displayed.
- Lists the Staging/Performing object models, audio/video data and event collisions that have been imported into the scene.
Select an assignment by activating each checkbox. - Event collisions can also be assigned. Conversely, if you do not assign it, event collision will not respond as a trigger.