Performing Editor
Body Parts
Basic operation
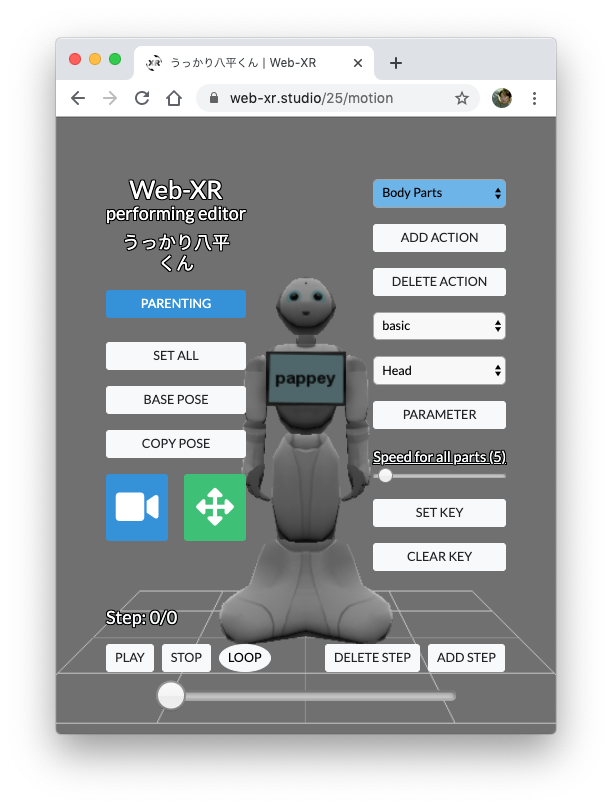
①
②
③
④
⑤
⑥
⑦
⑧
⑨
- Add a new action.
- Delete the created collision.
- Select an action listed in the select box.
- Select a part object listed in the select box.
You can also select it by clicking the part object on the screen. (Pick operation) - Usually move/rotate the object by mouse drag or touch drag, but if you want to make detailed settings, click the [PARAMATER] button to open the [Parts Paramater] window and enter the parameter range.
- Specify the speed of movement/rotation. Click to switch between individual parts/whole parts.
- Set the key.
- Delete the key.
- Opens a window for building a parent-child relationship.
New Action
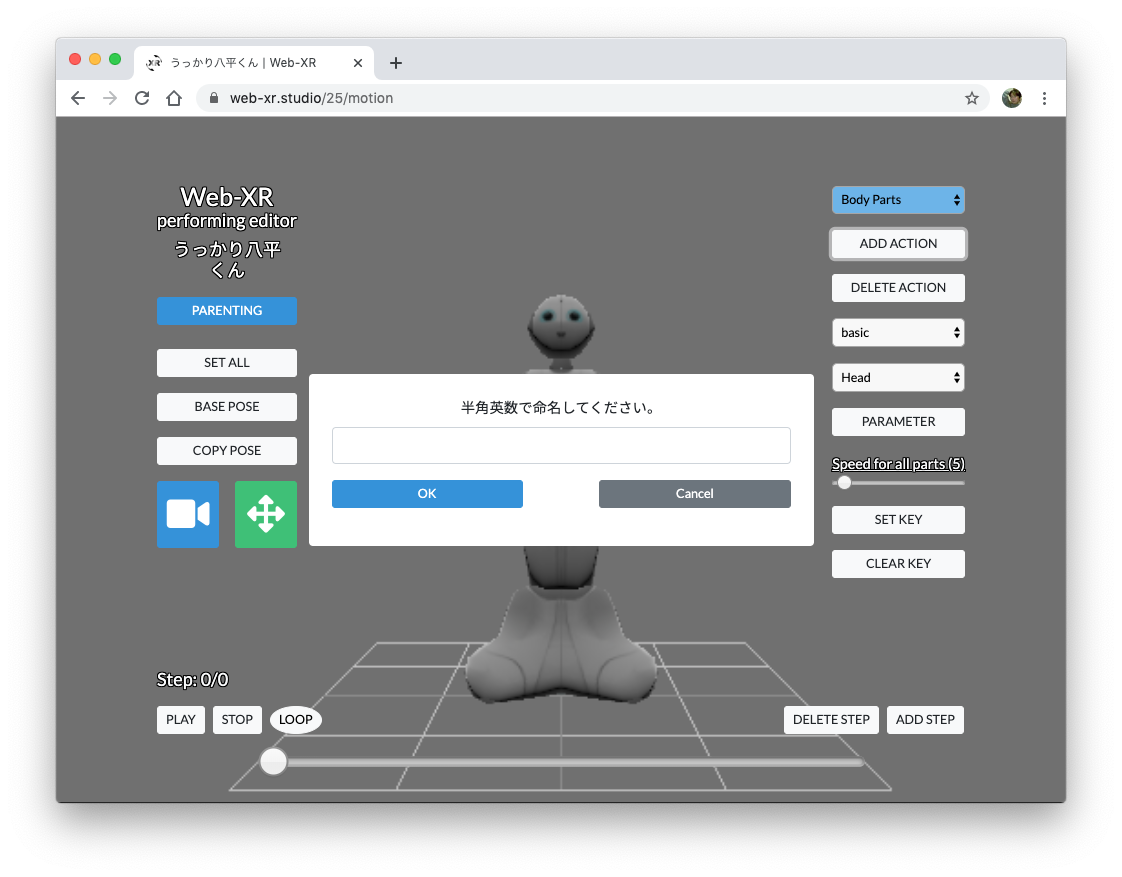
①
- Enter a new action name in single-byte alphanumeric characters.
An action is a unit of movement. It is an image that is a collection of walking loops or an action of waving.
Let's name [walk][initial][waving_hand] and so on in an easy-to-understand manner.
Parenting Parent-child relationship construction
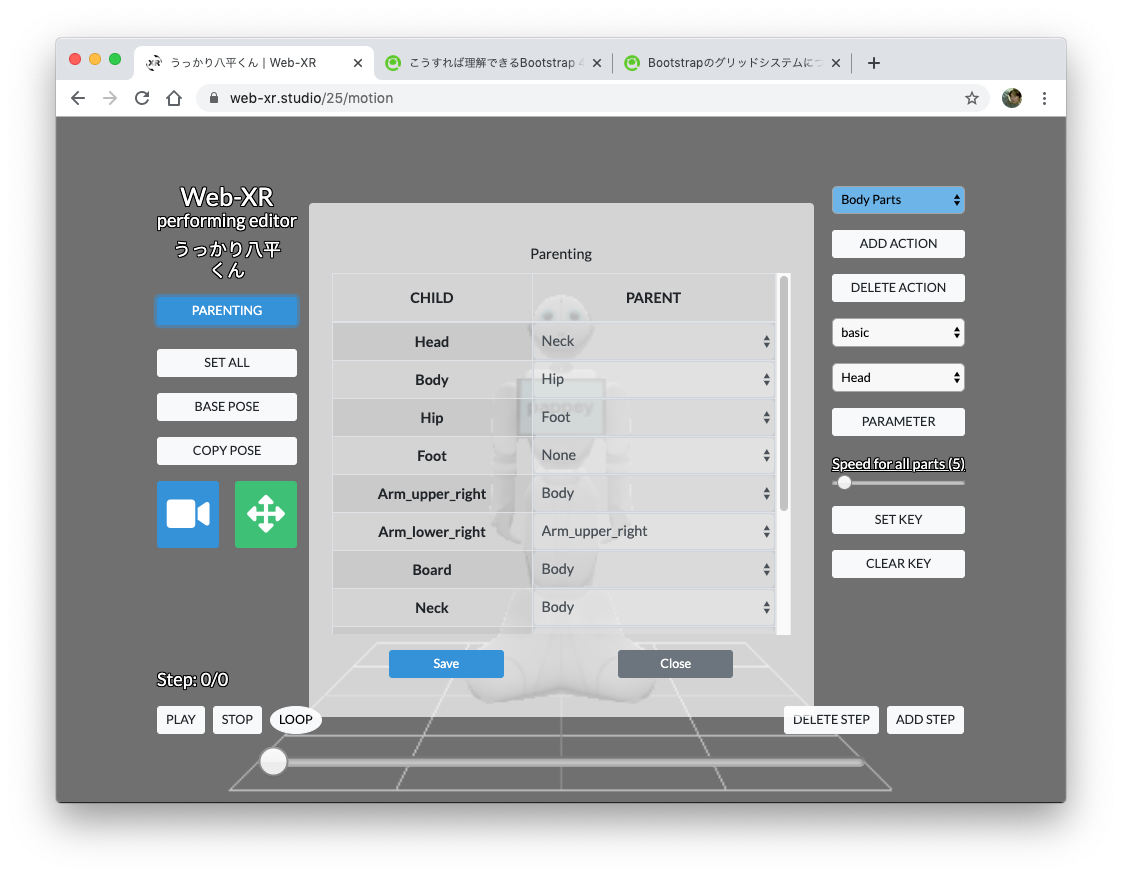
①
②
- Child: The object names specified in the 3D tool are displayed.
- Parent: Select a parent from the children.
Create the parent-child relationship here, not when creating the model with 3D tools.
Please set the origin of the object appropriately so that the rotation axis rotates at the joint in the 3D tool.
You cannot change the origin of an object within XR Studio.
The part for which no parent is specified in the parenting window becomes the root parent.
The root parent moves the entire object.